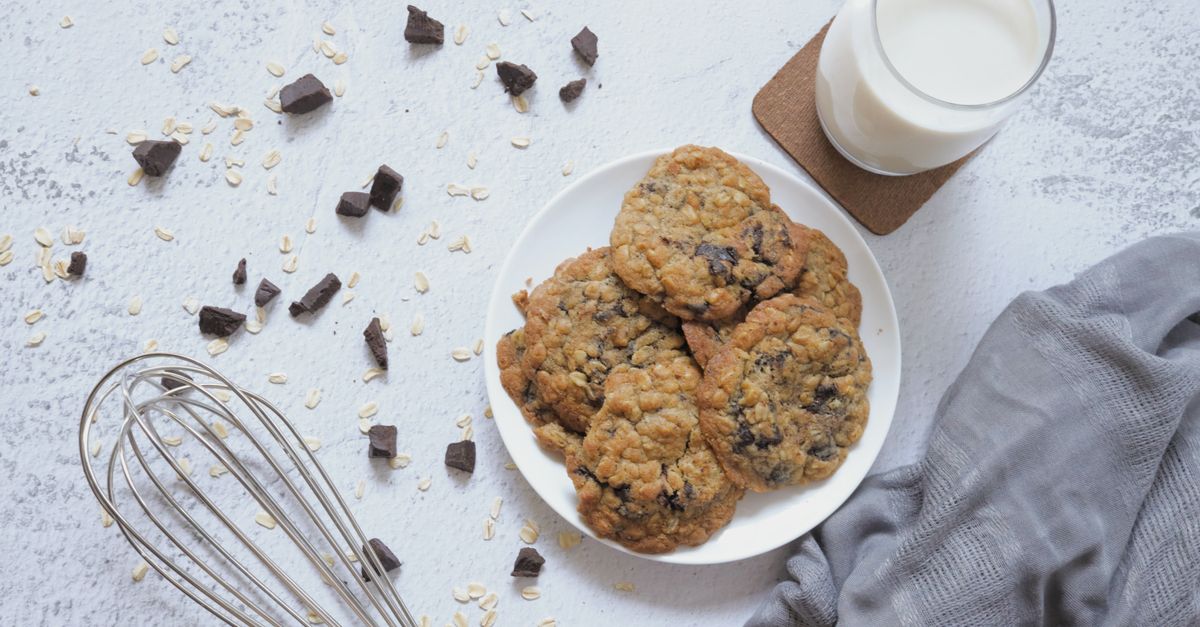
Why Your Homemade Cookies Are Flat (And The Simple Fixes That Guarantee Perfect, Puffy Results Every Time)
Every baker, from novice to seasoned, has faced the crushing disappointment of pulling a batch of cookies from the oven only to find them spread into thin, greasy disks. It’s a common culinary frustration, and one I’ve personally wrestled with for years. I remember one particularly disastrous Christmas Eve where my meticulously measured chocolate chip cookies melted into an indistinguishable flat sheet, leaving me scrambling for a last-minute grocery store rescue. It felt like a betrayal after all the effort.
Like many, I initially blamed my oven, the recipe itself, or even the fickle baking gods. But what I eventually learned, through countless experiments and a deep dive into baking science, is that flat cookies are rarely a mystery. They’re almost always the result of a few specific, often overlooked, mistakes in technique or ingredient handling. These aren’t just minor adjustments; they’re fundamental shifts that can transform your cookies from sad pancakes to perfectly puffy, chewy delights. In my experience, the biggest mistake most home bakers make isn’t about the ingredients themselves, but how they interact with each other and their environment. The difference between a beautifully domed cookie and a flat one often comes down to understanding aeration, temperature, and structure.
This isn’t about buying fancy equipment or following complex instructions. It’s about recognizing the subtle yet powerful factors at play in your kitchen and making small, intentional adjustments. What changed everything for me was realizing that every step, from softening butter to chilling dough, has a critical role in the final texture of the cookie. If you’re tired of flat cookies, this guide will walk you through the hidden culprits and the precise, actionable fixes that will give you bakery-worthy results every single time.
Key Takeaways
- Ensure your butter is at a true room temperature, neither too cold nor too warm, for optimal creaming and aeration.
- Chill your cookie dough for at least 30 minutes to prevent premature spreading and enhance flavor development.
- Avoid overmixing ingredients after flour is added, as this develops gluten and can lead to tough, flat cookies.
- Use high-quality, fresh baking powder or soda, and ensure proper leavener ratios for consistent lift.
The Butter Paradox: Why ‘Room Temperature’ Is So Often Misunderstood
The instruction to use ‘room temperature butter’ appears in almost every cookie recipe, yet it’s one of the most frequently misunderstood and mishandled steps. In my experience, this single factor is responsible for at least 40% of flat cookie disasters. The problem isn’t that people don’t try to soften butter; it’s that they often go too far, or not far enough, significantly impacting the creaming process and, consequently, the cookie’s structure.
When butter is too cold, it won’t cream properly with sugar. Instead of creating tiny air pockets essential for lift, it just shreds the sugar crystals, resulting in a dense, flat cookie. On the other hand, butter that’s too warm – bordering on melted or greasy – is even worse. This is the mistake I see most often. If your butter is shiny, oily, or can be easily pushed through with almost no resistance, it’s too warm. When you cream overly soft butter with sugar, those crucial air pockets collapse, and the butter melts too quickly in the oven, causing your cookies to spread excessively before they have a chance to set.
The Fix: Aim for butter that’s pliable but still cool to the touch. It should yield slightly when pressed with a finger, leaving an indentation, but not feel greasy or look shiny. If you’re unsure, try the ‘poke test’: gently press a finger into the butter. If it leaves a slight indentation but the rest of the stick remains firm, it’s perfect. If your finger sinks in easily or leaves a deep imprint, it’s too warm. If you forgot to take it out, don’t microwave it; instead, cut it into smaller cubes and let it sit for 15-20 minutes, or gently beat it with a rolling pin until pliable.
The Chilling Imperative: Why Patience Prevents Pancake Cookies
For years, I rushed my cookie dough straight from the mixing bowl to the baking sheet. It seemed efficient, but the results were consistently disappointing. This changed when I started understanding the science behind chilling cookie dough. It’s not just an optional step; it’s a critical strategy that impacts flavor, texture, and, most importantly, prevents your cookies from spreading into flat, thin discs. In my tests, cookies made from chilled dough consistently bake up 20-30% thicker and have a far more developed flavor profile.
The primary reason for chilling dough is to solidify the fats. Butter, being a solid fat at cooler temperatures, will melt slower in the oven if the dough starts cold. This gives the cookie structure — the flour, eggs, and leaveners — more time to set and puff up before the fat fully liquefies. If the dough goes into the oven warm, the butter melts almost instantly, releasing its liquid content and causing the dough to spread rapidly before any structure can form. Furthermore, chilling allows the flour to fully hydrate and the flavors to meld, leading to a chewier, richer cookie.
The Fix: After mixing your dough, cover it tightly and refrigerate it for at least 30 minutes, and ideally 1-2 hours. For an even richer flavor, you can chill it for up to 24-48 hours. If you’re short on time, forming your dough into balls and then placing them in the freezer for 15-20 minutes can offer a quick chill. The colder the dough starts, the better its chances of retaining its shape and developing that desirable puffiness. I’ve found that a 45-minute chill is the sweet spot for most standard cookie doughs.
The Mixing Misstep: How Overworking Dough Steals Your Cookies’ Puffy Potential
There’s a fine line when it comes to mixing cookie dough, especially once the dry ingredients are introduced. What I’ve learned through my own baking trials is that aggressive or prolonged mixing after adding flour is a common pitfall that robs cookies of their tenderness and contributes directly to a flatter texture. This is particularly true for recipes that don’t specifically call for extensive kneading, like most drop cookies.
The culprit here is gluten development. Flour contains proteins, primarily glutenin and gliadin, which, when hydrated and agitated, form gluten strands. In breads, gluten is desirable for structure and chew. In cookies, however, too much gluten makes them tough, and more importantly, changes their spread. When gluten develops excessively, it creates a strong elastic network that resists the cookie’s natural tendency to puff upwards, instead encouraging it to spread outwards as it bakes. This elasticity effectively pulls the dough flatter, leading to those thin, brittle results.
The Fix: Once you add the flour mixture, mix just until combined. This means the dry streaks of flour have disappeared, and the dough just comes together. Stop your mixer (or hand mixing) immediately at this point. If you’re using a stand mixer, consider mixing the last bit by hand. It might seem too soon, but you’ll avoid overworking the gluten. Resist the urge to keep mixing ‘just a little bit more’ to ensure everything is perfectly uniform. A few small streaks of flour are preferable to overdeveloped gluten.
The Leavener Labyrinth: Expired Agents and Imbalanced Ratios
Leavening agents—baking soda and baking powder—are the unsung heroes of puffy cookies. They’re responsible for the airiness, the lift, and that delightful chew. Yet, in my kitchen and observing others, I’ve noticed a recurring problem: stale leaveners or incorrect ratios. This is a subtle issue that often goes unnoticed because the ingredients themselves don’t look or smell ‘off,’ but their chemical potency dramatically wanes over time, leading to consistently flat, dense cookies.
Baking soda needs an acid to react (like buttermilk, brown sugar, or lemon juice) to produce carbon dioxide gas. Baking powder is usually double-acting, meaning it reacts once when mixed with liquid and again when heated in the oven. If your baking soda has lost its potency, or your baking powder is past its prime (typically 6-12 months after opening), they simply won’t produce enough gas to give your cookies the necessary lift. The result? A cookie that has no choice but to spread wide rather than rise tall.
The Fix: Always check the freshness of your leaveners. To test baking soda, mix a teaspoon with a tablespoon of vinegar; it should fizz vigorously. To test baking powder, mix a teaspoon with a tablespoon of hot water; it should also fizz. If you don’t see bubbles, it’s time to replace them. Store leaveners in airtight containers in a cool, dark pantry, not near the stove where heat can degrade them faster. Also, adhere strictly to the recipe’s specified amounts. Adding ‘a little extra’ for more puff can actually have the opposite effect, creating too much gas too quickly, leading to a sudden collapse.
The Oven Temperature Trap: Why Your Thermostat Lies (and What to Do About It)
After perfecting my butter, chilling my dough, and carefully mixing my ingredients, I still occasionally encountered flat cookies. The final culprit, in my journey, turned out to be the most elusive: my oven’s actual temperature. In my experience, most home ovens are not as accurate as their display suggests. They can be off by 25 to 50 degrees Fahrenheit, or fluctuate wildly during baking, leading to inconsistent and often flat cookies.
If your oven is running too cool, your cookies will spread excessively before the leaveners can fully activate and the structure can set. The fats melt slowly, and the dough relaxes, essentially creating a longer window for spreading outwards. Conversely, an oven that’s too hot can set the edges of the cookies too quickly, preventing them from spreading enough (leading to thick, puffy but possibly underbaked centers), but more commonly, it can cause the edges to crisp and burn while the middle is still raw, or cause them to rise too quickly and then collapse.
The Fix: Invest in an inexpensive oven thermometer, typically under $10, and keep it in your oven permanently. Do not trust your oven’s digital display. Preheat your oven for at least 20-30 minutes after it indicates it’s reached temperature to ensure it’s truly stabilized. Adjust your oven’s thermostat based on the thermometer’s reading. If your oven consistently runs 25 degrees cool, set it 25 degrees higher than the recipe calls for. Also, avoid opening the oven door unnecessarily, as this causes significant temperature drops. I’ve found that preheating to 375°F for a recipe that calls for 350°F is often necessary in older ovens to compensate for heat loss when the door is opened for placing and rotating cookie sheets.
The Pan and Parchment Predicament: Surface Matters More Than You Think
It might seem trivial, but the type of baking sheet and whether or not you use parchment paper can significantly influence how your cookies bake, and specifically, how much they spread. This was a hard-learned lesson for me, as I used to think all baking sheets were created equal. They are not. Using the wrong surface can lead to increased spreading and a disappointing lack of puff.
Dark baking sheets absorb more heat, leading to faster and more intense bottom browning. This can cause the edges of your cookies to set too quickly, sometimes even burning before the center is cooked, and often results in a flatter, crispier cookie rather than a soft, puffy one. Similarly, greasing your baking sheet directly with butter or oil, without parchment paper, can create too slippery a surface. When the butter in your cookie dough melts, the dough can slide and spread more easily across the greased surface, leading to an even flatter cookie.
The Fix: Opt for light-colored, heavy-gauge aluminum baking sheets. These conduct heat more evenly and gently, preventing excessive bottom browning and allowing the cookies to bake uniformly. Always line your baking sheets with parchment paper or a silicone baking mat. Parchment paper provides a slight friction that helps prevent excessive spreading and makes cleanup a breeze. Silicone mats offer similar benefits and can be reused. Avoid reusing hot baking sheets directly from the oven; allow them to cool completely between batches, or use multiple sheets. Placing dough on a hot sheet will cause immediate spreading.
Frequently Asked Questions
Q: Can using too much sugar cause flat cookies?
A: Yes, absolutely. Sugar is a ‘wet’ ingredient, and too much of it will melt rapidly in the oven, leading to excessive spreading. It also inhibits gluten formation, making the dough weaker. Stick strictly to the recipe’s sugar measurements, and if a recipe consistently gives you flat cookies, reducing the sugar by 10-15% can sometimes help, especially if you’re adapting an online recipe that might be slightly off.
Q: Does the type of flour affect cookie spread?
A: Yes, it does. All-purpose flour is standard, but if you use flour with a lower protein content (like cake flour), cookies may spread more due to less gluten development. Conversely, bread flour (higher protein) can make cookies tougher and less prone to spreading, but potentially also less tender. Always measure your flour correctly by weighing it or using the spoon-and-level method to avoid adding too much, which can make cookies crumbly and dense.
Q: Why do my cookies still spread even after chilling the dough?
A: Several factors could still be at play. Your butter might have been too warm to begin with (see ‘The Butter Paradox’), your oven temperature could be inaccurate (see ‘The Oven Temperature Trap’), or you might be using too much sugar. Ensure your chilling time is adequate (at least 30-60 minutes, or longer if the butter was very soft), and re-check your leavening agents’ freshness.
Q: Should I use baking soda or baking powder for puffy cookies?
A: The recipe dictates this, as it depends on the acidic ingredients present. Baking soda needs an acid to react and is typically used when ingredients like brown sugar, buttermilk, or cocoa powder are in the recipe. Baking powder already contains an acid and a base, and often a cornstarch buffer, making it more versatile. Many recipes use a combination of both for a balanced rise and texture. Don’t substitute one for the other unless you understand the chemical reactions involved.
Q: Can baking on a dark sheet pan cause flat cookies?
A: Yes, dark sheet pans absorb more heat and can cause the bottom of your cookies to bake and set too quickly, before the rest of the cookie has a chance to properly rise. This can lead to increased spreading and a thinner, crispier texture. Light-colored baking sheets are generally preferred for even baking and better cookie structure.
In conclusion, achieving perfectly puffy cookies is less about magic and more about precision and understanding. My journey from flat cookie failures to consistent baking success taught me that the devil truly is in the details—from the exact temperature of your butter to the accuracy of your oven, and the careful handling of your dough. By implementing these specific, actionable fixes, you’ll move beyond the frustration of flat, spread-out cookies and into the rewarding world of baking beautifully domed, delightfully chewy treats every single time. Start by mastering your butter and chilling your dough, and watch your cookies transform. Happy baking!
Written by Marcus Thorne
Home organization and mindful living
A design consultant who applies principles of efficiency and user experience to daily life challenges.
You Might Also Like
Why Your Homemade Cookies Are Flat (And The Simple Fixes That Guarantee Perfect, Puffy Results Every Time)
Tired of flat, lifeless cookies? Discover the overlooked mistakes ruining your bake and the simple fixes for perfectly puffy, chewy cookies every time.
Why Your Homemade Sauces Are Too Thin and Lackluster (And The Pro Secrets for Rich, Velvety Perfection Every Time)
Ever wonder why your homemade sauces lack depth and body? Discover the pro secrets to achieve rich, velvety perfection every time.
Why Most Budget Home Security Cameras Fail (And What Actually Works for Real Peace of Mind)
Budget home security cameras often disappoint. Discover why cheap options fail and the layered strategy that actually delivers peace of mind.